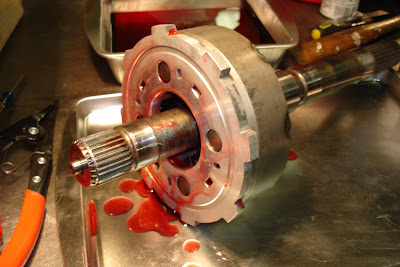
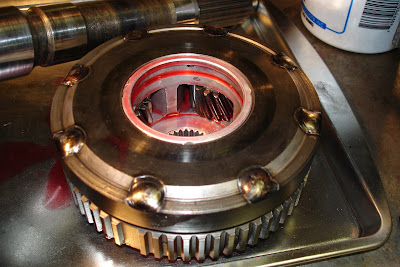
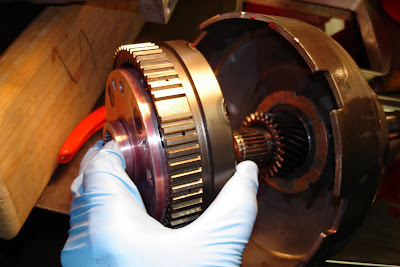
First, get the driving shell and sun gear (you can see the sun gear at the left rear). I did install some new bushings into each side of the sun gear, but I don't have photos of that process. It was fairly painless. They went in easily with my press and a socket.

Lube the sun gear up in some fresh ATF. This whole process with the gear train is messy!

Now find the thrust washer with 4 tangs. These interface with the sun gear teeth.

Place it on the driving shell, aligning the tangs with teeth in the shell.

Now take the sun gear and slide it into the teeth in the driving shell. Now this is important: I found that the longer section of the sun gear (it's not quite divided in half) needed to be up, or to the REAR of the transmission.

The sun gear in place.

Flip the driving shell over and install the associated snap ring onto the sun gear inside the driving shell. It's a wire type.

Now set this assembly aside until needed later.

Now we'll work with the intermediate shaft and the rear annulus gear. The rear annulus gear is the one with internal splines that mesh with the intermediate shaft.

Slide the annulus gear onto the forward end of the intermediate shaft with the teeth of the annulus gear toward the front of the transmission.

Find the thrust washer with notches that match the splines on the intermediate shaft. Apply some assembly lube to both sides.

Slide it onto the intermediate shaft and into the rear annulus gear, meshing it with the splines on the intermediate shaft.

Now soak the rear planetary gear assembly in some fresh ATF. The rear assembly is the one with the driving tangs on the outer circumference.

Slide the rear planetary onto the intermediate shaft, meshing the planetary gears with the gears in the rear annulus.

Make sure the rear planetary gear assembly is fully bottomed into the rear annulus gear.

Now find a new tabbed thrust washer with 4 tabs. The old one on the right shows significant wear.

Spread some assembly lube on both sides of the tabbed thrust washer.

Now install the thrust washer on the forward side of the rear planetary gear, interfacing the four tabs with the four associated slots in the planetary gear. Now is a good time to put some assembly lube on the intermediate shaft surfaces that the sun gear will ride on.

Now take the driving shell assembly and install it on the front end of the intermediate shaft. The sun gear should slide down into the rear planetary gear assembly.

Find the new tabbed thrust washer with 3 tabs. The old thrust washer is on the left. It shows a bit-o-wear!

Apply assembly lube to both sides of the thrust waster.

Install the thrust washer with the tabs interfacing with the three holes on the inside of the driving shell.

Now we need the front annulus gear and front planetary gear assembly.

Soak the front planetary gear assembly in some fresh ATF.

Find another new 4 tabbed thrust washer. Again, the old one on the left shows some good (bad?) wear.

Coat both sides of the thrust washer with assembly lube and install it onto the back end of the front planetary gear. The back side has a lip the extends up at the inside circumference.

Place the front annulus gear over the front planetary gear assembly. Make sure the planetary gears fully engage with the annulus gears.

Now slide this assembly, annulus gear first, onto the front of the intermediate shaft and into the driving shell.

Here's the front planetary/annulus assembly in the driving shell.

Install the associated snap ring on the end of the intermediate shaft.

The snap ring installed.

Now find a small wood block and set the forward end of the intermediate shaft on it.

Jiggle the shaft up and down and bit, rotate the components, maybe tap it soundly against the wood block. This is to seat the components so that we can take a measurement.

This gap at the top (rear) of the rear annulus gear is what we want to measure.

Use a feeler gauge to find the gap. The FSM says we want a gap between .006" and .048". My measurement came in right around .010". This is good since it gives me lots of room for wear (heaven forbid!) of the thrust washers. If this measurement is out of spec you adjust it by using a thicker or thinner snap ring on the forward end of the intermediate shaft.

Now coat the surfaces of the intermediate shaft that will ride inside the overdrive piston retainer.

Apply some assembly lube to the internal surfaces of the overdrive piston retainer.

Now slide the completed planetary gear train into the front of the transmission. Slide the rear of the intermediate shaft into the overdrive piston retainer.

Notice the tangs of the rear planetary gear assembly interface with notches in the rear drum.

Make sure the planetary assembly is fully seated against the rear drum.

One last thing! Apply some assembly lube to the end of the intermediate shaft. Find the small thrust washer.

Install it on the end of the intermediate shaft.

Here's the planetary gear train looking in from the front of the transmission.

Whew! Long post. Next: rebuilding the rear clutch.


