Although I already tore down the transmission a few weeks ago, I thought I'd put a post in here about that. First things first...I ordered an FSM (Factory Service Manual) before I started on this. It was recommended to me as probably the best step-by-step for the 46rh tear down and rebuild. When it arrived, I WAS impressed. It's about 4" tall and some 1600 page. It covers the Cummins engine as well which is nice to have. I got it from Books4Cars.com. They were about $20 cheaper than anywhere else I could locate. I had it in hand about 5 days from when I ordered it.
First, a couple of things people and books have said over and over.
- Be sure to keep everything clean, clean, clean. The books emphasize to NOT use any rag or towel that will leave lint behind as that will foul up the valve body later. They specifically say to use a "lint free shop towel." I don't know what that is, and I doubt that it even exists. Everything has lint. So my procedure has been to clean the parts with solvent then dry them with compressed air. No rags envolved.
- Take your time. Lay everything out in order. Keeps bolts in the places you found them, etc.
I first pulled my transmission. I'm lucky enough to have a pit in my garage. I also purchased a pretty decent transmission jack a years back for working on my father-in-law's truck. With the pit and jack combined I can have the transmission out in about 2 hours.
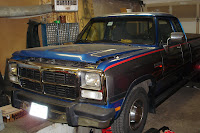
Here's a photo of "The Dog" over the pit. You can see it, just barely, under there.
I hit upon an idea from some other's that have done this before me to use pans for the parts. That way, the transmission fluid doesn't run all over your bench. I found these handy cookie trays at the local dollar store for, yes, a dollar. They've worked out wonderfully although I was they were a tad larger.
Here's all the parts laid out, just mocking me!
And the cases. The left photo shows the main case on the left and the overdrive/extension housing on the right. The right photo peers down into the main case. That's the overrunning clutch cam down there in the bottom.
Once into the transmission I found out what my major problem was. The 3rd/direct clutch pack was toast! The frictions and nothing left on them, and the whole pack was cone-shaped instead of flat as it should have been. I think this happened because, a few years back, my throttle valve cable fell off. That essentionally engaged the clutch pack with very little line pressure. Lot's of slipping occured and the frictions went to the bottom of the pan.
Here's a couple of pics of the "best" friction. The others had no material at all left on them.
This is the whole clutch pack. What a mess.
This is a sideways view of one of the steels. It should be flat; almost paper thin. Instead, it has a cone shape to it. The whole clutch pack was like this.
Since the friction material had all worn off, the thickness of the clutch pack was quite a bit less then standard. This caused the forward clutch engage piston to push out (against the clutch pack) more than it was meant too. Too many times of that action and the seal was comprimised. This was my real problem; no 3rd gear and hesitant reverse (not enough pressure behind this piston to engage the clutches).
The coning out of the clutch pack also chaffed the pressure plate for the forward clutches. You can see the abrasion on the inside edge. I'll have to get a new one of these.
That's about it for the tear down and what I've found in the internals. Most of the thrust bushings show considerable wear as well. I'll post pics of them in the respective rebuild sections to follow. Follow the procedures in the manual for the tear down. It's crystal clear.
Next: cleaning up the parts.


No comments:
Post a Comment