The first thing to do is press in a new bushing into the pump body. I used a wood block to push it in flush with the pump body. Easy does it...of course. There is a special tool for this, for getting the depth just right, but I just centered the bushing between the inner and outer edges of the bore. It worked just fine.

Here's a sort of blurry photo of the bushing in place.

Now, in order to hold the bushing in place, you need to stake over an area that corresponds with one of the cutouts in the pump body. I just used a flat punch. It didn't take much to dimple the bushing out and into the pump body.

Now, the manual says to use a shop knife to cut off any burrs that may be in the area of where you staked the bushing. I thought, "Yeah, right, that won't work very well." Well, it worked wonderfully! The bushing material is quite soft. You do this twice 180 degrees apart from each other.

Here's a photo of the area I cut/smoothed with the knife.

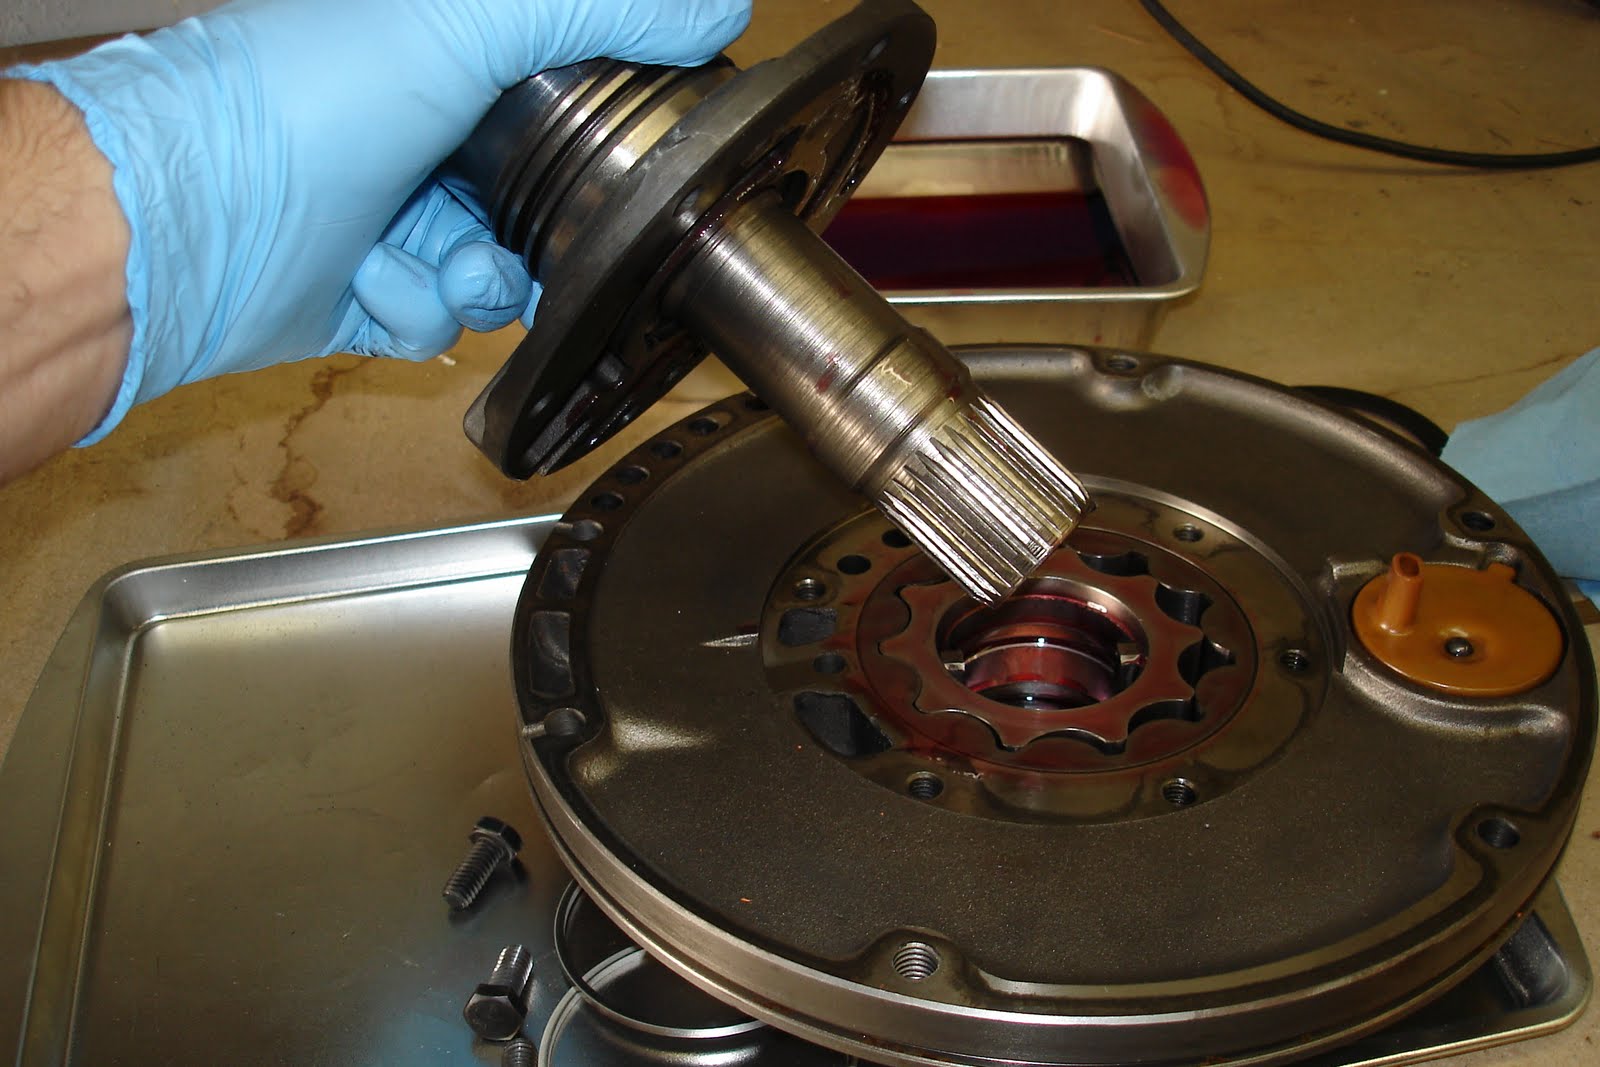
Now here's all the pieces we'll be working with. The pump body, the pump gears, the reaction shaft support over on the left side, two metal seals, and one plastic spacer/bushing.

I put a layer of fresh ATF all over the gears.

Slide the outer gear into the pump housing.

Then nest the inner gear inside of that. Make sure the drive dogs/teeth/whatever are oriented correctly. They face towards the front of the transmission.

I'm sorry that I don't have any photos measuring the pump gears for clearance. The first measurement is with a straight edge across the top of the gears/pump housing. The clearance should be .001" to .0025". The second measurement measure between an inner gear tooth and the outer gear, then between the outer gear and the pump body. These clearances should both be .0035" to .0075".
I did purchase a new gear set with all my parts I got for this rebuild. But when I got them installed and measured the clearances, they actually measured larger gaps (worse!) than the original pump. So I put the original pump gears back in.
Now slide the reaction shaft support into the inner pump gear. There is a bushing inside the reaction shaft support. I didn't get a new one with my rebuild kit, and the old looked to be in pretty good shape. So I left it in place.
Thread in the six bolts. The reaction shaft support will only orient one way on the pump body since the bolt pattern is asymmetrical.

Torque those bolts to 175 in. lbs. That's 175 INCH pounds. So approximately 14.5 ft. lbs.

Slide the plastic thrust washer onto the reaction shaft support. I coated it with some assembly lube.

Now install the two metal style locking seal rings into the two grooves in the reaction shaft support. Of course, I used some assembly lube on those.

I made the locking tabs opposite each other. In other words, 180 degrees apart.

Next: Installing the O/D unit.
.JPG)
12 comments:
What all "SPECIAL" tools did you need for this job? you can send me an email.
Thank You
Joe
dksob81@hotmail.com
Hi Joel,
Fantastic job on your transmission write up. I got to installation #10 and couldn't find anymore. Did you stop or did I catch up to the point of where you are at in the rebuild? Eather way I can't thank you enough for the instructions. I have a 47re that works fine but has 200K on it and I wonder about how much longer it will last. Your write up convinced me I can do it myself. I am looking forward to the list of parts that you ordered to do your rebuild. I, as you, am not looking for a transmission to pull a sled but one that will give me reliable service. Again thank you for your excellent work on the write up.
Floyd
Thanks! The reason I put this together was my frustration that I couldn't find any instruction on how to do it.
Well, I'm a bit embarrassed about my progress here. The transmission has been in service now for well over a year! I have a 6-month old now, and she has eaten up lots of my time. I'm trying, trying, trying to get to the rest of the write-up! Stick with me!
Hi Joel
If it is going to be awhile untill you get back to the write-up could you post a list of parts and the kit you got, and where you got them?
Thanks again
Floyd
Floyd,
I'll certainly try and get to that, and to the rest of this, soon. Thaks for reading!
Joel
Hey Joel
This may sound like a strange request but whats your overall opinion about the places you got parts from. Ive had some bad luck with one of them and was looking for another supplier.
Have as much fun with your little one as you can. I won't tell you they grow fast because your already finding that out. I've got one the same age. Kids are Awesome
Anonymous,
Yes, kids are awesome. But, damn, I'm tired!
I got the majority of my parts from PATC. They supplied quality parts, but the customer service sucked! I made one mass order of all the parts. They shipped on totally incorrect part, and goofed up on the number of clutches for one of the packs. It took sever phones calls (I don't recall how many) to try and straighten this out, and a total of maybe 3 weeks. So, yes, that was frustrating. I had heard that this might be the case with this supplier before I ordered. But their prices were the lowest I could find.
I got some a few other parts from my local AAMCO. They were awesome in working with me. I was mildly surprised.
I got the special service tools from TransTool.They shipped fast and I have no complaints about them.
My major frustration was in just trying to find the common non-performance parts. All the suppliers will only sell to shops, and won't ship a $2 part. I did find one place in Denver that I could pick up items Will Call.
Good luck!
Very interesting stuff. Great job on the write up!! I had one of these go out once, it was one of the few things I didn't tackle myself at the time, but I am a believer in doing it if you can. If someone out there can do it, then so can I...and I usually do a better job on my own stuff;) Plus, I learn more every time I take on a project. Looking forward to reading more on your blog!
Thanks Tony, I'm always planning on finishing the up, but never quite get to it. Hopefully... Soon...
Joel:
Did you ever finish up this project?
I can't locate the end of this rebuild.
Man you did a fantastic job.
I am anxious to see how it ends!
I have one to tackle myself & sure could use the help.
brian
Yes. This job did get finished. And the results are mostly great. I'm wanting to get the rest of the posts up for this project. First for myself, just because I don't like to leave stuff un-done. And second for all the interested parties.
Hi Joe, I've been referring to your writeup for a couple of years. Sure wish you would finish it. My last project was building a 47rh for a 68 vette. Helped tramendously. We have trouble keeping clutches in the forward drum.We're using a billett. The pros have been in this 5 times, same results. The last time in we found the billet drum was not machined perfectly to spec and no matter what steels you used, they bound. Think we got it fixed now. But still, excellent reference material. Thxs.
Post a Comment