You can see that the new piston is quite a lot thicker. I first thought it had a double seal. But the instructions indicate that the metal ring is for support only.

Here's the seal installed. The lip of the seal points down into the bore in the case.

To install the center piece and spring I put the new piston in the vise. This isn't as scary as it looks. The jaws of the vise aren't clamping on any surface that is going to contact another surface. Then I install the OEM snap ring to hold the 3 pieces together.

Here's the assembly so the spring is visible.

Apply some assembly lube to the seal surfaces.

Lube the servo bore with some fresh ATF.

Drop the piston into the bore with the spring up and the seal lip pointing down.

I used a .010" feeler gauge to help work the lip of the seal down into the bore correctly. Easy does it here.

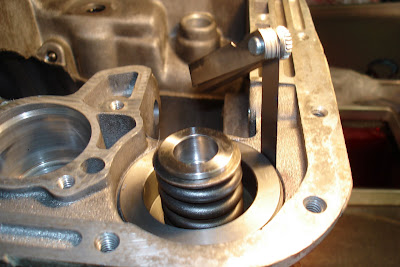
Slide the larger servo spring into the bore and on top of the piston. Place the servo spring retainer on.

Now compress the spring and install the associated snap ring. The spring is light enough that I was able to compress it by hand - no c-clamp required.

Next: Installing the rear drum, reverse/low band linkage.
No comments:
Post a Comment