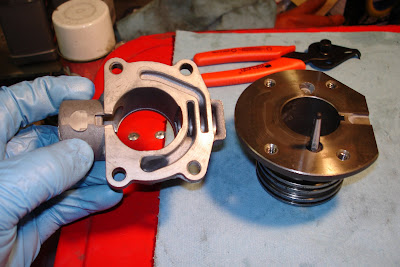
Here's the governor cleaned and disassembled.

First I assembled the weights. These move the valve back and forth depending on output shaft speed and controls pressure to the valve body so that you get shifts at the right spot. The diesel version of the 46rh has a brass weight assembly (it's heavier) in order to provide for lower shift point.

The spring goes inside the larger piece. The smaller piece slides down into that with the spring in between the two. Then the snap ring holds it all together. A little assembly lube or ATF on these parts is good too.


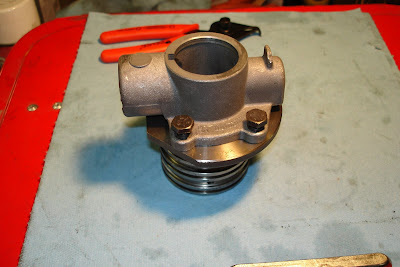
Now assemble the two halves of the housing. Be sure to include the filter (it comes in the rebuild kit). It pretty obvious where it goes. The flat side seats down a little depression. The cone extends into the other housing the only way it can. Interestingly enough, this governor had no filter when I disassembled it. You can see the filter sticking up out of the half on the right, and where it fits into on the other half.

Fit the two halves together and insert the four bolts. Don't worry, it only goes together one way because the bolt locations aren't symmetrical.

Then torque those to 8 ft/lbs (I went a little more).

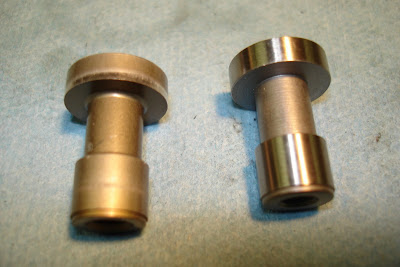
I did get a new governor valve. The OEM aluminum can mushroom and get stuck in the bore. The new valve on the right is made from steel. So no deforming. I tried to get a Sonnax valve that was aluminum but had wider contact areas. It wasn't available anywhere. I was concerned the steel valve would change the shift points. But I was assured that it wouldn't, and that if it did I could tune it with adjustments to the TV cable.

That's about it for the governor. I can't assemble fully the weights and valve since you have to put the assembly down over the output shaft then slide the weights and pin in holding it all together with 2 e-clips.

Next: rebuilding the output shaft and overdrive planetaries.
No comments:
Post a Comment