I decided to do a couple of upgrades on these parts. First, I opted for a longer spring. It has the same spring rate, it's just 1/4" longer than stock. The only problem is, I think mine already had the longer spring! Oops. Oh, well. A fresh spring can never hurt. The new spring is on the left. The old spring is on the right.

I also decided to upgrade the clutchpack itself. My original clutchpack contained 8 friction discs and 7 steels. I upgraded to a pack that contains 23 single-sided discs. This gives me about 43% more surface area on the clutches. They have steel on one side and the other side has the friction material. This upgrades the overdrive direct clutch to what is currently in a 48RE transmission.
Here's my old clutchpack. 8 frictions and 7 steels.

And here's the upgraded clutchpack. 23 single-sided discs plus the pressure place and reaction plate.

On to the assembling!
I first ready some ATF for soaking the friction discs. I'm using AmsOil Universal Synthetic ATF. I've had great results with it. You may prefer something different. That's fine.

Here's the discs soaking in the ATF. Soak them for at least 30 minutes.

Now place the upgraded spring on the spring plate atop the planetary that was assembled earlier.

Then place the direct clutch hub on top of the spring.

Now slide the reaction plate (it has internal teeth to mesh with the clutch hub) over the direct clutch hub. Make sure the notch is down and the top face is the flat side.

Now start stacking the clutch discs on the reaction place. Start with a friction disc for normal packs. I started with a disc that has internal teeth. Alternated friction-steel-friction-steel-etc. I alternated internal teeth-external teeth-etc. Then end with the pressure plate on the top, flat side down. This photo is of the discs stacked up before I soaked them in ATF. Be SURE to soak them before assembly!

I did purchase one special tool. It's basically a dummy intermediate shaft that helps align the splines of the over-running clutch hub and the planetary gear. It's possible to assemble the unit without it, but it's whole lot easier with it. Stick it down in the assembly and leave it there to keep the splines aligned. With the tremendous pressure exerted by the big spring it's impossible to get the intermediate shaft in if the splines aren't aligned. This is the best pic I have of it. (I'll post a list of tools at the end of this blog cycle.)

Now I moved this assembly over to my press. I made a special tool (you can see it on top of the clutch drum) to help compress the spring and still allow me access to the snap ring the goes on the end of the sun gear shaft. You can buy these. But making it saved me around $80. Make sure you stack the clutch pack around the clutch hub before you put it in the press. Otherwise, you'll have to take it out again to stack it up!

Now just slide each piece down inside the clutch drum one at a time. Compress the spring as you go to allow enough space for the pieces to drop down.

Now that it's fully compressed install the associated snap ring (a wire type) around the end of the sun gear shaft.

Now install the associated snap ring (a wave flat style) in the clutch drum over the pressure plate.

Another view.

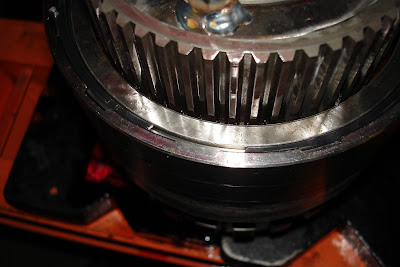
This is the fully assembly view. BUT...

I noticed that the sun gear shaft stuck up out of the assembly a little too much. After some research I discovered that there are two versions of the overdrive clutch pack pressure plate. I thick version at .410" from face to snap ring shoulder. And a thin version at .085" from face to snap ring shoulder. I had the thick version. After some exhaustive searching I could find the thin version NOWHERE. So, in desperation, I drive down to the local AAMCO shop and explained my situation. They were actually HAPPY to order the part for me.
So here's the two pressure plates. The old thick one on the left. The new thin one on the right.

Another view.

Now here's a picture of the assembly after installing the thinner pressure plate. It looks much better. The shaft in the middle is the special tool for aligning the splines of the over-driven clutch and the planetary gear.

Next: readying the O/D case.
4 comments:
Where did you get the tool at to align the splines?
I got it from transmissionpartsusa.com. JT-1307. I just checked their site and they don't show that they have this tool currently. It was around $110 with shipping. Looks like you can get it at trnw.net for about the same price.
You can use the intermediate shaft from the transmission as the alignment tool if you build the OD unit first.
Post a Comment